


4 Things You Should Never Overlook When Doing Your Brakes


Micah Wright/Autos Cheat Sheet
“Speed has never killed anyone… suddenly becoming stationary, that’s what gets you.” — Jeremy Clarkson
The joys of being a DIY guy are multifaceted. As a one who relishes in learning new ways to save, I take great joy in sharing what I have been taught over the years. Cars are expensive enough as it is, and as our report from earlier in the year proves, quick service stations aren’t always to be trusted.
Doing your own brakes is a great way to save some serious bucks by shopping around for the perfect components online, and can guarantee that your car’s stopping power is up to snuff and properly installed every time. Just don’t forget that regardless of how large or small the project may be it ultimately falls on you, the DIY guy, for no one else is in charge and any slip-ups or oversights incurred along the way rest on your shoulders alone.
For as easy-sounding as it may seem, something as simple as a fresh set of pads and rotors can be an incredibly daunting task fraught with broken bolts, stuck sliders, seized calipers, and rusted rotors. Tetanus-riddled, dirty, and dangerous, there is nothing glamorous about busting out a brake job in your driveway, and without access to a lift, this simple procedure can become back-breaking work in no time.
But all of the busted knuckles, grime-covered clothes, and incessant profanity suddenly seem all worthwhile when you realize that the wheels are going back on, everything has been reassembled and greased properly, and that you just saved hundreds of dollars. Being a “201″ DIY piece, we will not be covering the importance of always buying brake shims/hardware just in case, how crucial brake parts cleaner can be, why removing the master cylinder reservoir cap matters, releasing the e-brake, or how to safely insure that the “bedding process” is complete. All of these things are a given when it’s brake job time, so make sure all of these things get addressed appropriately as you go through the motions. So grab your overalls, a cold six-pack, some good pads and rotors, as well as the proper tools for the job, and let’s get down to rediscovering the importance of proper stopping power.
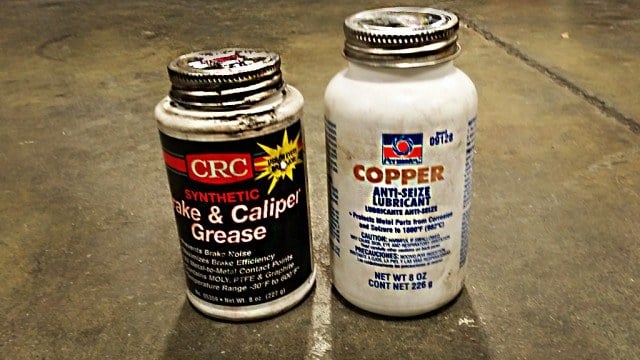
1. Caliper compressors, copper anti-seize, and brake grease
Micah Wright/Autos Cheat Sheet
Having the proper tools for the job is often times just as important as getting high quality parts themselves, for nothing is more frustrating than realizing that you have just disassembled your entire brake system just to find out that you don’t have the appropriate tools to put it back together.
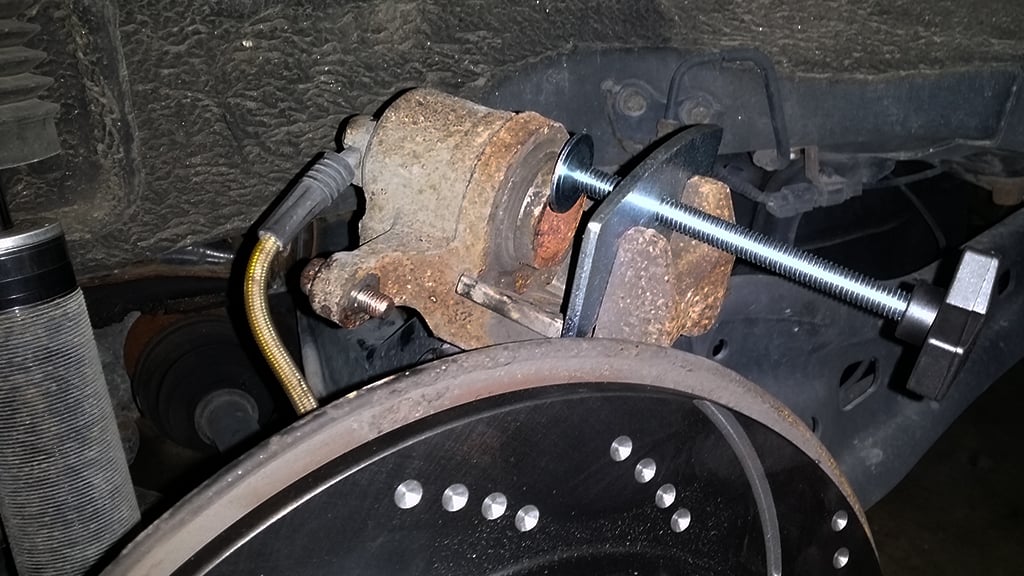
Do yourself a favor and pick-up a caliper compressor for $10-15, a fat bottle of brake grease for lubing the slider pins and shims, and a container of copper-laced anti-seize. The compressor will allow you to press the piston back into the caliper safely and with minimal effort as seen above, the brake grease will help prevent stuck sliders, and copper anti-seize is perfect for brakes due to its higher heat threshold. This last part of the preparation process should be slathered onto spindles to help guarantee that your fresh rotors won’t seize onto the hubs.
Micah Wright/Autos Cheat Sheet
- Caliper Compressor/Pad Spreader — I got a Craftsman version of this tool from Sears for about $10, and for cars that require rear caliper pistons to be rotated back in, the ratcheting cube found here is ideal.
- Permatex Copper Anti-Seize Lubricant — Handling heat all the way up to 1,800 degrees Fahrenheit, this stuff is what you want in areas that see extreme temps.
- CRC Synthetic Brake Caliper Grease — Safe to use on plastics, metals, and rubber, this stuff coats sliders, shims, backing plates, o-rings, and more every time.
2. Brakes save lives: Never buy crappy components

Micah Wright/Autos Cheat Sheet
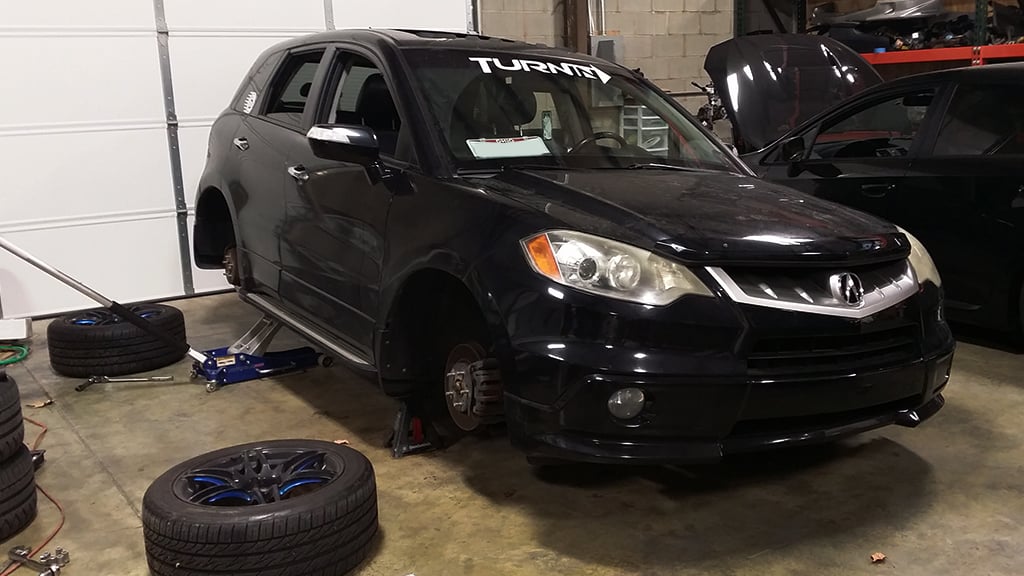
Cutting corners when it comes to something that saves your life every time you get behind the wheel is a risky endeavor at best, and when you think of it like that, chances are that opting for crappy pads and rotors will never be an option again. After seeing great success with EBC Brakes and their GD, dimpled and slotted rotors and Yellowstuff pads on the RDX a few years back, we decided to return to the British-based brand and try out some of their latest and greatest offerings.
EBC uses a new “NITROTHERM” process for applying anti-corrosive paint, a process that coats the entire rotor with warm nitrogen for a better finish, negates the need for brake parts cleaner, all while keeping corrosion at bay. Opting for dimpled and slotted GD sport rotors gives you class-leading cooling courtesy of wider veins, while the slots on the surface help channel expelled gasses and brake dust away from key contact points. Dimples are a unique EBC offering, which give you all the benefits of drilled rotors, but without all the rust clogging them up. Supposedly, EBC’s Redstuff pad compounds reduce the phenomenon of pad “Pick up” or disc scoring, and have even lower dusting effects than ever before. Tested at Britain’s Motor Industries Research Association (MIRA), Redstuff pads reportedly “reduced car stopping distance in tests by almost 50 feet from 100 MPH, offering a staggering 30% brake improvement,” a statement that thus far I believe in its entirety as I continue to test and review these pads on my daily driver.

Micah Wright/Autos Cheat Sheet
- EBC GD Sport Rotors — These rotors are amazing, even though they are nearing the deeper end of the performance pool, so opting for either USR Slotted Rotors or OE Premium Blanks from EBC remains a solid bet for drivers looking for milder applications.
- EBC Redstuff Pads — Much like the GD rotors, this ceramic brake compound is a bit more performance-oriented, so opting for Greenstuff or Ultimax2 pads might be better for most applications since they are less aggressive, all while remaining 100% Eco-friendly.
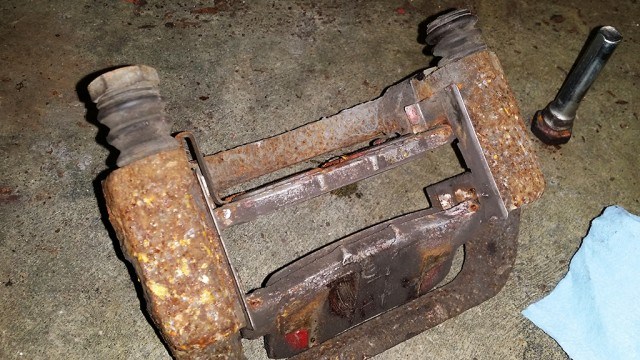
3. Be sure to brush, inspect, and lubricate everything

Micah Wright/Autos Cheat Sheet
After removing your rotors, break out a stiff wire brush and give the spindle assembly of the hub a thorough once-over. Be careful not to breathe in any of the dust you will inevitably kick up. Corrosion likes to build-up in this area, making rotor removal a total pain if not addressed properly. Making sure all excess rust is cleaned-up appropriately will guarantee that when it comes time to slather the aforementioned anti-seize on this key contact point, you will have a nice, clean surface for which to apply it to.
But before all that happens, in order to get the rotors off, you must first remove the caliper brackets. Once it pops loose, do yourself a favor and remove all of the slider pins, then liberally spray brake parts cleaner in the holes from which they came, as well as the pins themselves, and then reassemble everything with copious amounts of brake grease. I typically pack extra grease into the dust boots themselves, grease-up the pins liberally, and then reassemble. Any excess grease will ooze out the sides, which I just wipe it up with a rag.
Micah Wright/Autos Cheat Sheet
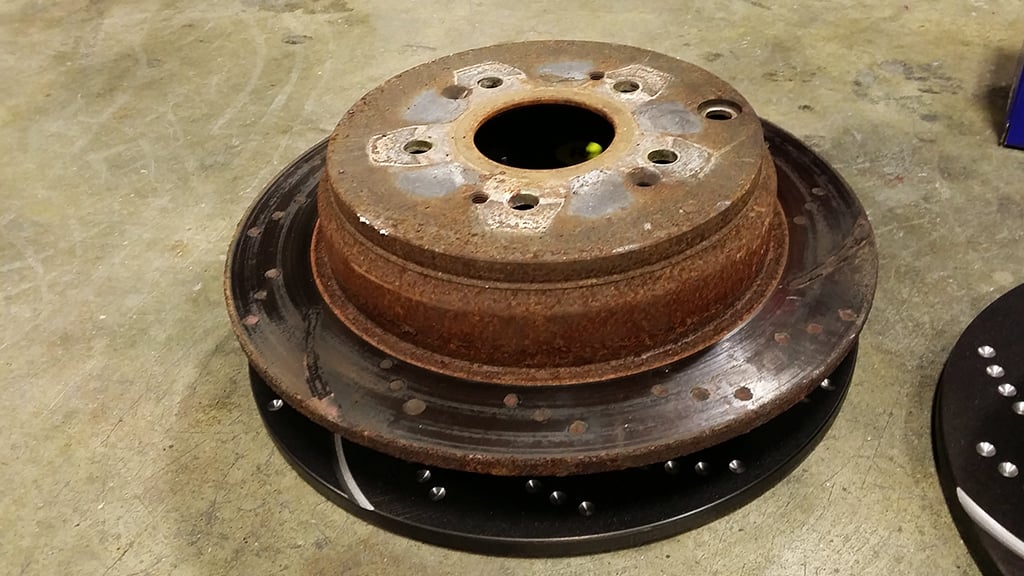
4. Measure and adjust accordingly
Micah Wright/Autos Cheat Sheet
While it pains me to put a rusty old rotor on top of a glistening brand new one, making sure that both hat heights and widths are spot on, as well as a rotor’s diameter is accurate, offers excellent piece of mind prior to installation. Mistakes will sometimes occur in the packaging department, and a product’s box does not always properly represent what is contained therein. Do yourself a favor and put each rotor and brake pad side-by-side for a quick comparison. It isn’t worth it if you reassemble everything only to find out that you have the wrong size rotor on one corner of your car.
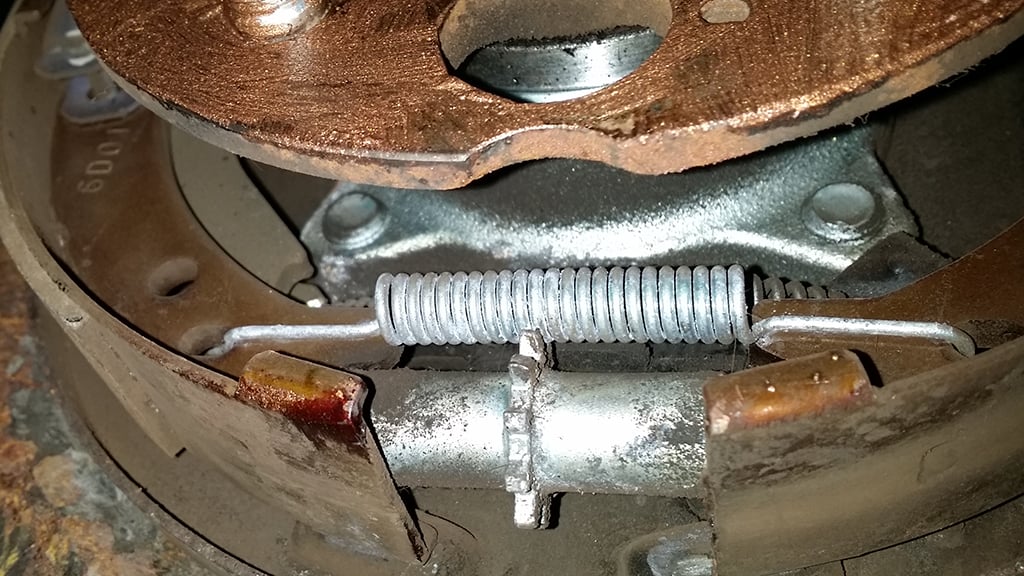
Another important aspect people will sometimes not think about is having to readjust the e-brake once the old rotors come off the car. My RDX has shoes in the rear for the emergency brake, so getting new rotors on the back proved to be a tad tough at first — since sometimes the e-brake’s calibration will readjust when accidentally bumped. Don’t panic, just know that a little adjustment might be required in order to get the fresh disc to slide on without issue. An adjustment wheel typically rests directly beneath the spindle, so once you locate it, you can dial in the shoes by taking a flathead screwdriver and manually pushing/spinning the teeth. It’s a trial-and-error, tedious kind of task, with lots of tapping on the shoes in order for them to center up, but just keep attempting to place the new rotor on until it slides over the shoes easily.
Micah Wright/Autos Cheat Sheet
2016-08-13 22:29:32
ADD:No. 1, Xiaban, Xiufeng Village, Shekou Town, Fu'an City, Ningde City, Fujian Province TEL:0086-0593-6388368||6558596 FAX:0086-0593-6338966 E-mail:brake@fjhuari.com / huari3348@126.com
Copyright ? 2013 Fujian Huari Automotive Parts Co., Ltd. All Rights Reserved.
Copyright ? 2013 Fujian Huari Automotive Parts Co., Ltd. All Rights Reserved.
